homage style

when your home is your canvas

schedule a design consult
  • blog
  • services
    • styling & decorating
    • home staging
    • virtual home staging
  • featured
  • about
  • workshops
  • contact
  • subscribe

slumber party

21 May 2013 by Andrea Leave a Comment

You know I love numbers and letters. I just love the look of vintage zinc letters, but of course don’t like the price. Or waiting to find the perfect font or the perfect combination of letters to create the word I want.

So I decided to make my own. Let’s go faux!

My bedroom has a giant vaulted ceiling behind my bed that acts as the focal point in the room. Sort of. Not much to focus on. In fact, it’s…

bedroom nonfocal wall

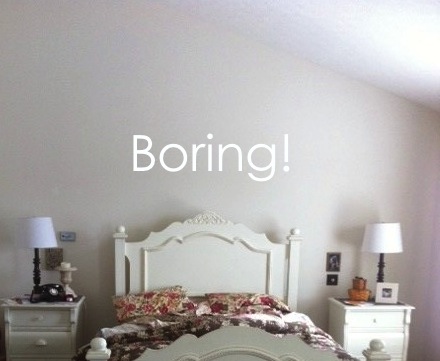
 Please ignore the unmade bed. This pic is originally from a post about messiness.

I decided to come up with a word appropriate for the bedroom. So what are you supposed to do in a bedroom? Um, no, not that. Geez. Get your mind out of the gutter. The other thing. Yes, that’s right. Sleep. Catch some Zs. Rest. Slumber.

Slumber…a calming word. Perfect and peaceful.

slumber 3

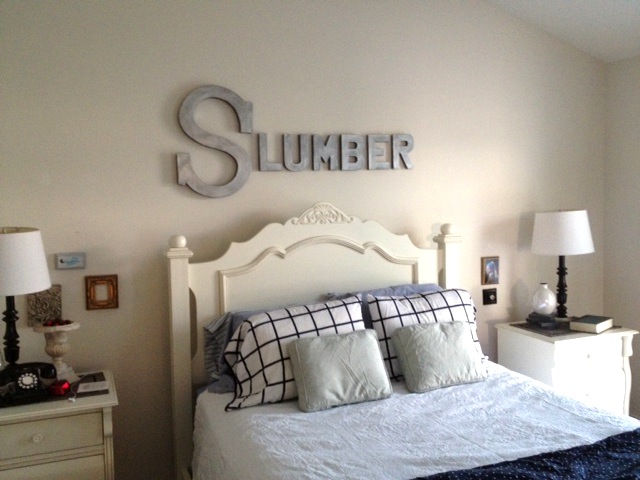
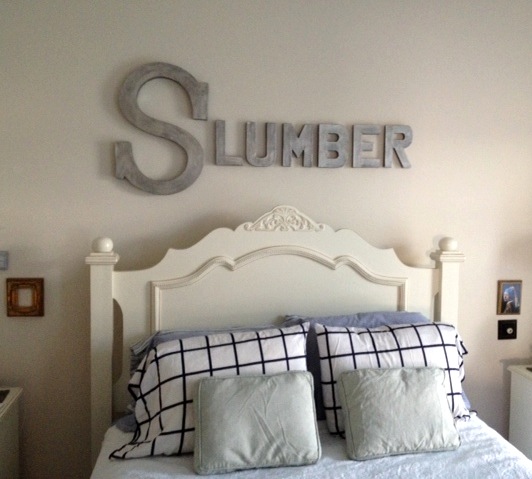
What do you think? Doesn’t it look awesome? I just love it!

slumber 5

The letters look perfectly metallic!

slumber 1

Can you believe that they’re just paper-mache letters that you can get from Michael’s or Joann for a couple of bucks a pop? To be honest, this project, like most others, has cured for a couple of months, so the receipt has escaped me. But rest assured that I used a 50% off coupon and/or got these letters on sale. So including paint, definitely less than $25 spent for an awesome wall hanging that has now turned my bedroom wall into a focal wall!

Here’s how I did it.

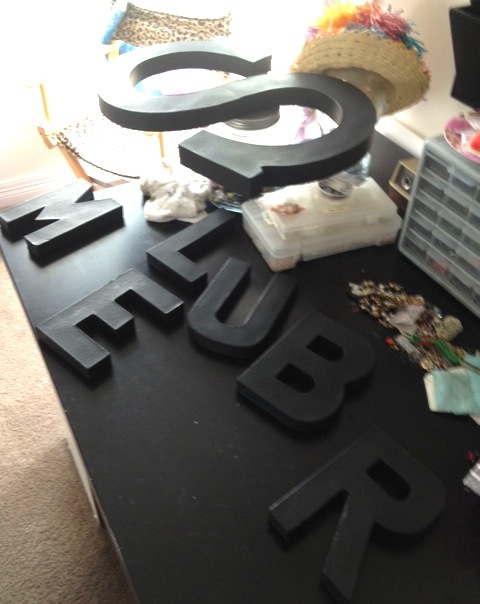
Cleared off only enough of my craft table to fit this project, because that’s just how I roll. Perhaps you might enjoy having a fully cleared craft area, but that’s your call.

Took some paper-mache letters…

 slumber 13


Painted a base coat using black craft paint…

slumber 12


Let them dry. Took a nap. Seriously. This project is perfect for a lazy Saturday afternoon.

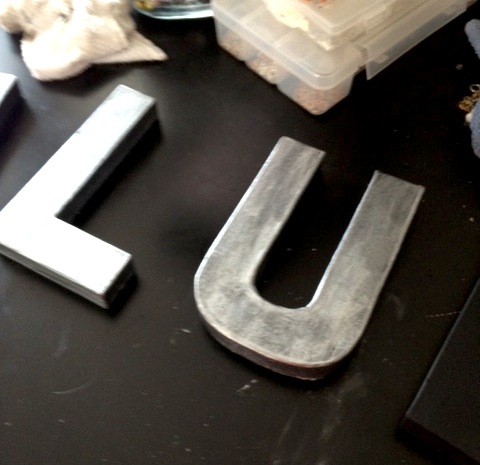
Using a small piece of a rag, did a dry rub of a silver metallic paint over the black paint, being sure to smooth and buff out any visible lines in the paint. When the rag got too saturated with paint, I cut and used a fresh piece of rag.

slumber 11


Rubbing on the paint…

slumber 9


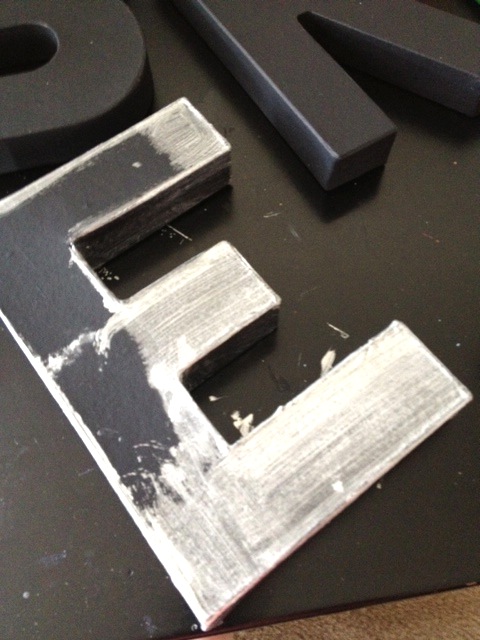
How the letters looked after one coat of silver metallic paint…

slumber 10


One coat wasn’t quite enough because there was still too much black showing through and the paint still had lines and looked “painted.”

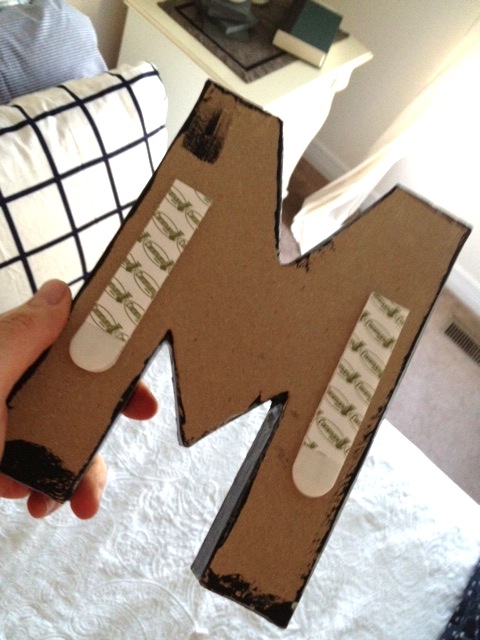
Took another nap while the second coat dried. When it was completely dry, I used 3M velcro picture hanging strips to adhere the letters to the wall.

slumber 6

Yes, in fact, I was standing on my bed when I took this photo, precariously balanced as I hung the letters!

As for placement on the wall, I just eyeballed it. I’m just kind of cool that way. I also like to hang and rehang things due to the eyeball method, but this one turned out pretty well. One time was all I needed. But you could go all out and take some measurements if you want to just be accurate and do things once.

I love how the drop cap “S” sits down in the crook of the headboard a bit…

slumber 4

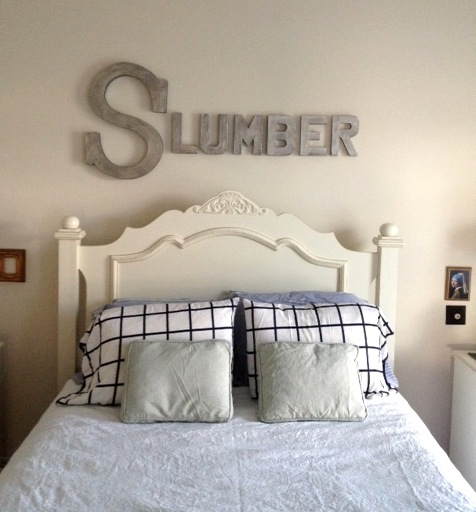
Overall, a successful project, wouldn’t you say?


spinning a yarn

28 December 2011 by Andrea Leave a Comment

In the office of my home there is a large and boring wall that’s been crying out for help for some time now.

It really needs some paint, but that’s not happening this week. I already started to give the wall a bit of flair with this fabulous frame…

…but there’s still a lot of wall left.

So I decided to spin a yarn.  Or at least use a skein of yarn to create a wall hanging.  Here’s the yarn…

It’s some seriously gorgeous yarn, and I wish that I could knit a throw with it, but I don’t have enough and it seems that they’re not making it any more. So a wall hanging it is.

This was a really quick & easy project. I used embroidery stretcher bars that I already had at home. They are pretty inexpensive – a couple of bucks each at your local craft store.

I tied the yarn around the stretcher bar…

…and started wrapping the yarn haphazardly around the stretcher bars…

…and when I was just about out of yarn, I knotted the end of the yarn around the stretcher bar…

And that’s all it took to create this…

I love it!  Adds some color, texture, and visual interest to an otherwise boring wall!

And cheap to boot!  While this project was free to me, since I had everything sitting around at home, if you had to go out to buy the pieces and parts, you could probably make this for between $10-$15.  Not bad! Perfect for decorating on a tight budget.

This project even won the seal of approval from my 11-year-old son, who said it’s “really cool!” Can’t beat that!

beach in a jar

24 April 2011 by Andrea Leave a Comment

A friend of mine bought her first place a couple of months ago, and I recently got the grand tour.

I wanted to give her a little housewarming gift, but I wanted it to be meaningful to her. She has a beachy/cottagey style, and has said that she wants her home to be peaceful and relaxing, just like she’s on vacation.  At the beach.

I thought, why not put the beach in a jar?

So, I purchased a glass jar with a lid, some vase filler – also known as sand – and I had a bag of seashells in my basement curing, waiting for just the right craft project.

First I filled the bottom of the jar with sand…

…then layered in the seashells, and voila!

A quick and easy (and inexpensive, yet meaningful) housewarming gift that will look great on a shelf.

(Hope my friend doesn’t read this post before I give her the housewarming gift!)

there’s a bird in my purse – tutorial

2 April 2011 by Andrea Leave a Comment

As you may know, I have a bird problem. So, in the event that you have a bird problem too, I thought I’d show you how to get a bird to nest in a vintage purse.

You will need the following supplies:

  • Vintage purse
  • Floral foam
  • Spanish moss
  • Floral pins (optional)
  • Decorative bird’s nest
  • Decorative bird’s eggs
  • Decorative bird
  • A couple of feathers
  • Hot glue gun

First order of business, find a vintage purse.  Check your local Goodwill, thrift store, or garage sale.

Then take some floral foam and cut it to fit inside the purse.

No need to use special tools to cut the foam.  Basic scissors will do.  And take note…cutting the foam is not a tidy job.  You will need to vacuum after this project.

Then insert the foam into the purse.

Next step is to cover the foam with the Spanish moss.

You can secure the moss with floral pins.

Next step is the nest.  A nest from a craft store may have wire prongs.  Position the nest where you want it in the purse and push the prongs through the moss and into the floral foam.  If the nest doesn’t have prongs, you can use floral pins to secure it.

When the nest is secure, hot glue several eggs in the nest.

Place your bird in the nest.  Your bird may have wires in the legs.  If so, you can use them to secure the bird in the floral foam.

However, if you’re placing your bird in the nest, the wire may be too flimsy to poke through the nest.  In that case, clip the wires and hot glue the bird in place in the nest or purse.

If your purse has a pocket, you can hot glue a couple of feathers in the pocket.  And voila!  A bird has nested in your purse!

I made this purse for my friend Claire, whose house I featured in a recent Road Trip.  Since Claire has lots of blue in her house – from sky blue to Tiffany blue – and plenty of red accents, I thought this would be a perfect gift for her (although I did ask her in advance if she was afraid of birds, since some people are, like my sister).  The good news is she loved it!

Showing off my bird problem at Funky Junk Interiors and Remodelaholic…

Funky Junk's Sat Nite Special

Remodelaholic

  • Email
  • Facebook
  • Instagram
  • Pinterest
  • Twitter

subscribe, baby!

Homage Style on Twitter
Homage Style on Facebook
Pin me! Homage Style on Pinterest

archives

WORK IN PROGRESS...

work in progress :: rose painting

FAVORITE PROJECTS...

the tornado lounge

another glorious chalkboard project

freshening up the family room

industrial chic curtains

angsty teen boy's room

almost instant art

vintage cowboy room

Copyright © 2025 · Beautiful Pro Theme on Genesis Framework · WordPress · Log in